
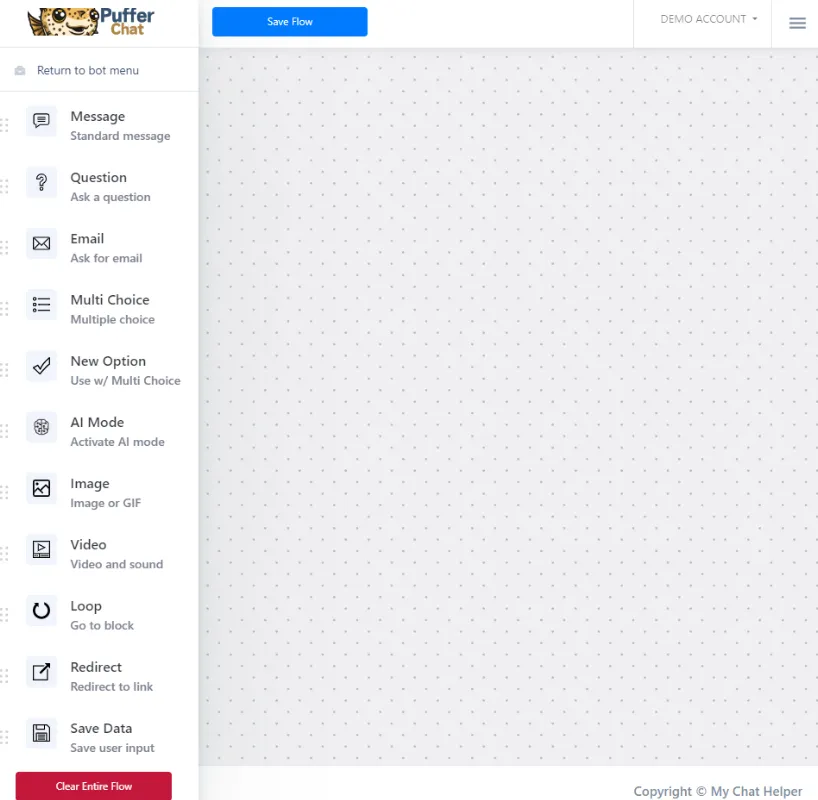
Flow Builder
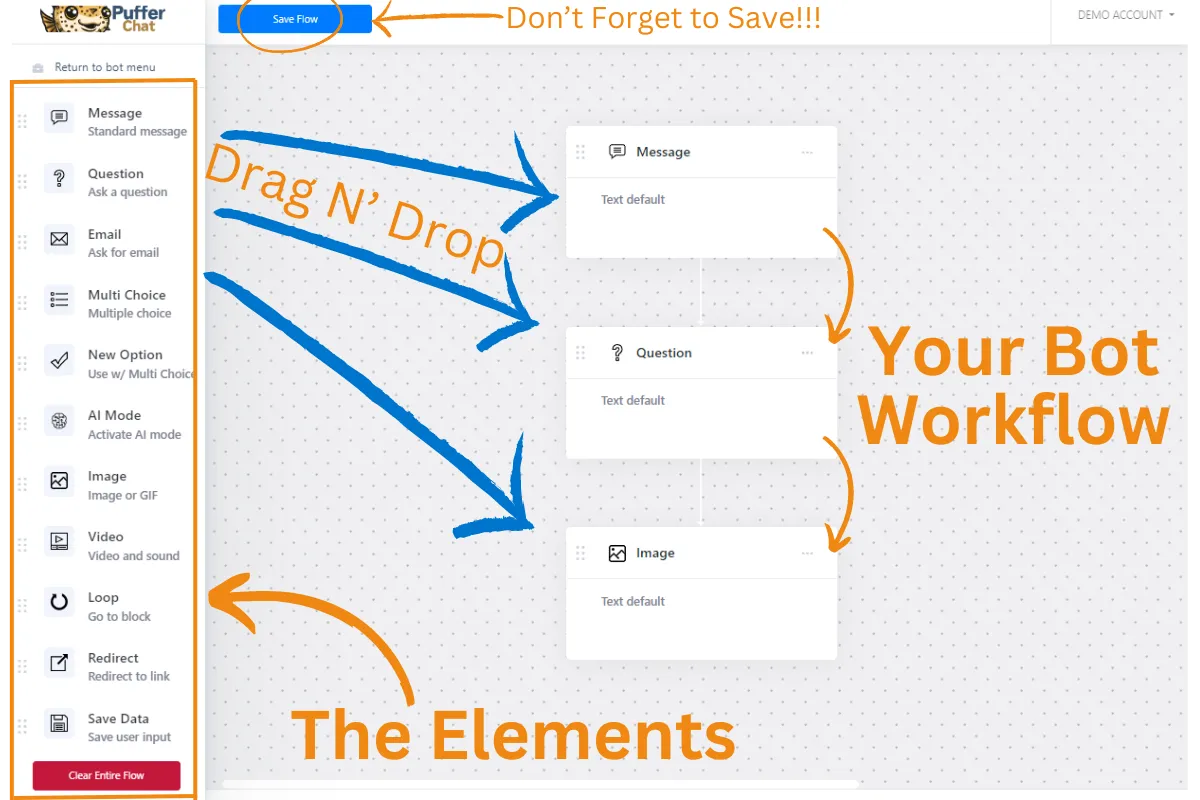
Step 1) Drag N' Drop an Element to the Workflow
Step 2) Click on the Element to Edit it
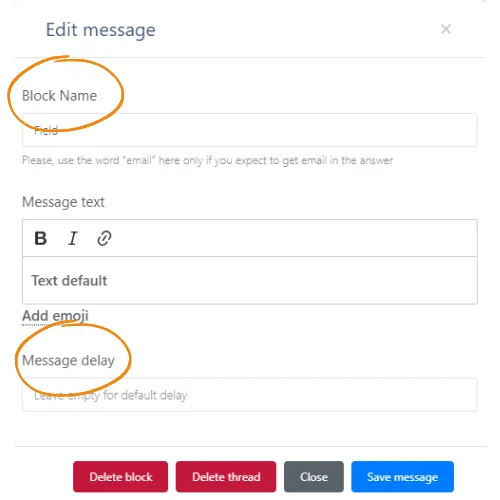
The Element Box Overview
Block Name
3 Reasons to Name Your Block:
Loop: Make your blocks easy to find when using the Loop Element.
Easy to Read Information: When getting notified of new leads, naming your blocks helps this information come through more clearly.
Use Responses in Future Messages:
Example -> In a 'Question Element' you ask the user their name.
You name that element: "Name".
In the next message, you can say: "Great to meet you , How can I help you?" and the Chatbot will input the data from the 'Name' Element.
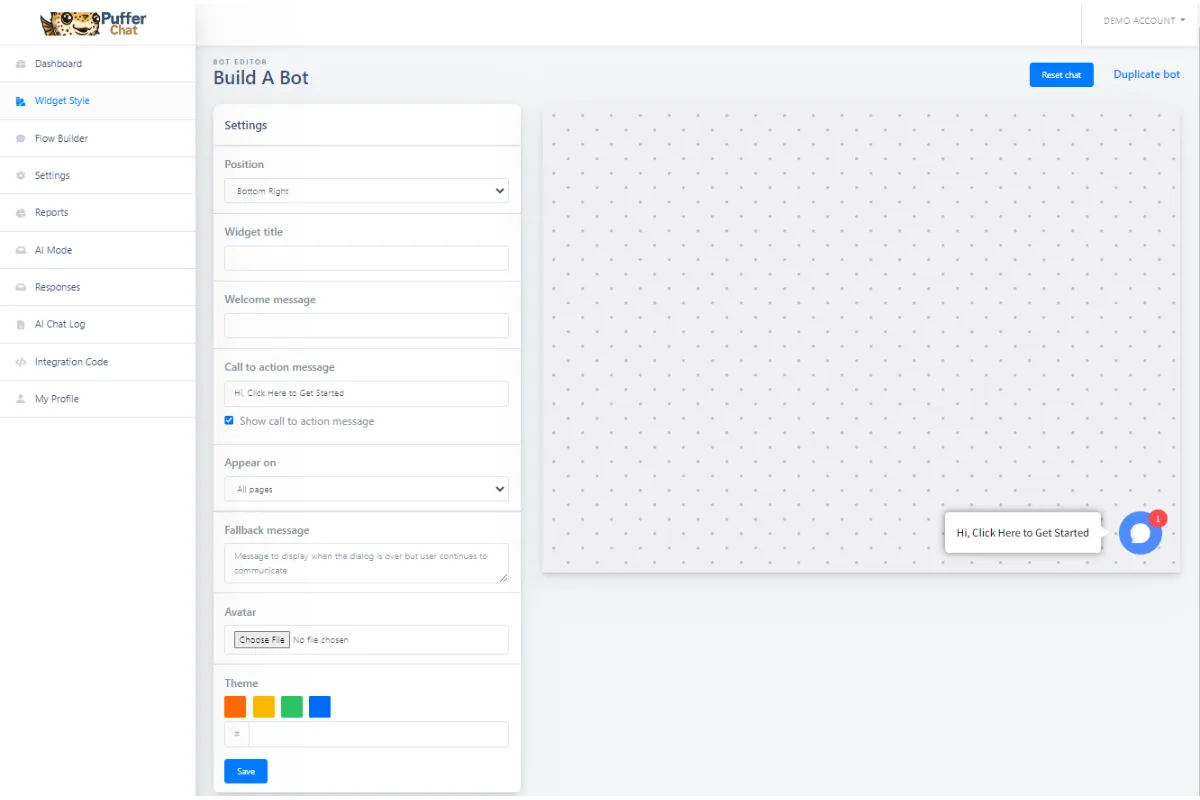
Message Delay
Enter a number if you want a delay before the message is shown. This can be useful if you are doing longer messages. Generally you can leave it blank.
The Elements Overview
1) Message
Send a message. Note: The user does can not respond and the bot will end after this (unless you add more elements under it)
2) Question
Ask the User a Question. The user will be given a chance to reply and the data will be collected.
3) Email
Ask for the User's Email. Note: This will trigger the ChatBot to send you a notification of a New Lead. So you may want to ask this last, after you gather the other information you want.
4) Multiple Choice
This gives users Pre-Set Options to Choose From.
You can do this 2 ways:
Survey Options
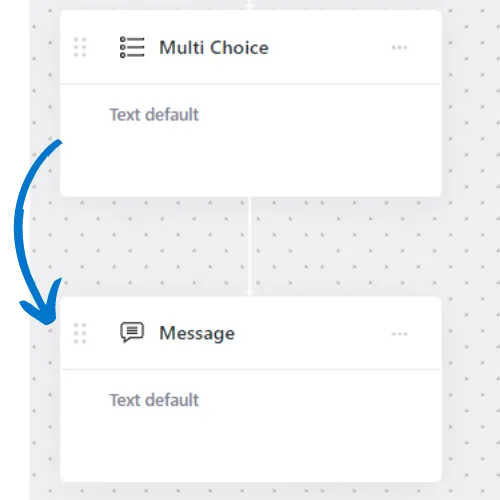
No matter which option the user chooses, they continue down the same path.
Use Options
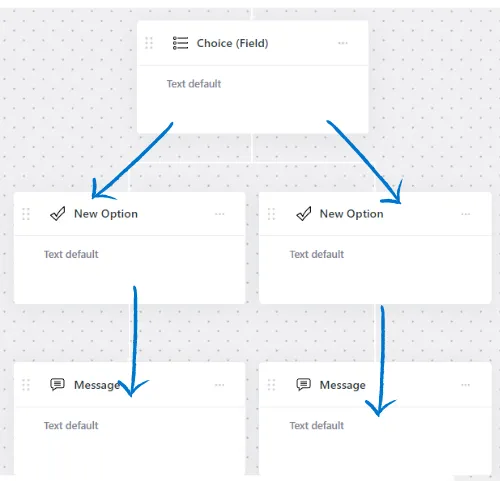
Create Branches, so the user takes a different path based on which option they choose.
5) New Option
Use this with the 'Multiple 'Choice' Element Above.
Once you check 'Use Options', you can Drag N Drop as many options under it as you like.
6) AI Mode
Business Name: The name of your AI ChatBot
Business Context: This is where you 'Prompt' your ChatBot. Let the Chatbot know what you want it to do and what information you want it to have.
Send AI Chatlog to enable integrations: How long do you want to wait (in minutes) for the ChatBot to send over the chat conversation to you.
Note: Once a user enters AI Mode, their is no way for them to exit, unless they restart chat.
You can enable AI Mode with an element in the workflow, or you can turn on 100% AI Mode by clicking 'AI Mode' on the left menu bar and click 'Enable', filling out the information there, then clicking Save.
7) Image
Show a Picture
8) Video
Show a video
9) Loop
Go to any other element in your workflow.
Note: This is where 'Block Names' come in handy. This makes it easy to find the Element you want to loop to.
Often, at the end of a chatbot, I will ask users in a Multiple Choice Element if they want to restart the chat, then use Loop to send them back to the beginning.
10) Re-Direct
Send people to a website link
11) Save Date
This tells your chatbot to send all the information over to you. (depending on where you told it to send it under 'Settings')
Pick a Help Section:

FAQs
Can I put my ChatBot on Any Website?
I feel like I'm casting aimlessly and don't have the right bait, why isn't my marketing working?
How do I get Help?
I do I stop battling in the 'Price Wars' by offering discounts (which just leads to sinking profits and a race to the bottom)?
Where do I buy PufferChat?
From unqualified leads to customer troubleshooting, How do I stop my phone ringing all day long answering the same questions?

Finnegan
Puffeciency Guru
Every great business started as a dream
We believe in your dream, and we're committed to turning it into reality. Together, we'll build a marketing strategy that's as bold and beautiful as your aspirations.
We offer a low pressure approach. We lead with value, awesome marketing ideas and free trails to our products. Feel free to reach out to learn more.